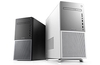
Window kit
Ok so you have you super dooper aluminium case but your bored and want to do something new to your case, well one of the most popular mods is the case window.
Basically you put a little window into a side panel on your case to allow you to view whats inside your pc. Its very simple to do and can make a case.
I have had several cases over the years and the ones with windows are much nicer, even my family like them which speaks volumes.
So what are the options for a case window:
- Buy an off the shelf side panel with a window pre fitted (Lian Li cases only).
- Buy a kit that you fit yourself.
- Start from scratch and pick the exact shape/colour of perspex you want.
The kit
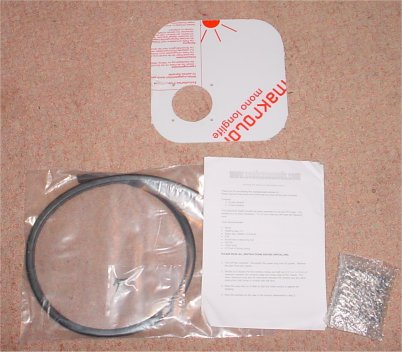
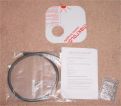 Here is the kit, this was kindly provided by www.coolcasemods.com
there are various kits to choose from and various colours. I picked a
clear square window with a blowhole pre-cut inside. This means I can add
cooling to the case while fitting the window.
Here is the kit, this was kindly provided by www.coolcasemods.com
there are various kits to choose from and various colours. I picked a
clear square window with a blowhole pre-cut inside. This means I can add
cooling to the case while fitting the window.
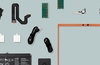
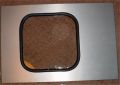
In the kit you'll get the following:
- 1 sheet of perspex cut to size with protective covering
- 1 fan (ystech)
- 1 fan grill(with fan screws)
- 1 section of rubber moulding
There are two types of window moulding for case windows , with and without a locking strip. This kit comes with the later type which I prefer.
What do you need?
Okay what do we need:
- A pencil/pen
- A file (For tidying the cut hole)
- Either a dremmel / jigsaw (for cutting the panel)
- Safety goggles (dremmel cutting blades have a tendency to shatter)
First Step
 Now if you have done a window before you may think the instructions can
be ignored, I did but then decided I better read them just in case, boy
am I glad. Firstly because the instructions from www.coolcasemods.com
where very detailed. Also because it was quite different from the other
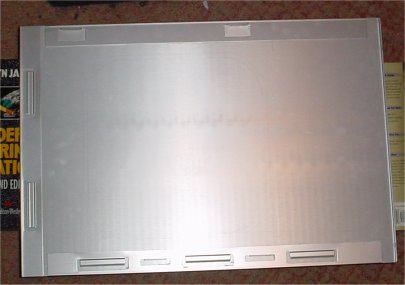
window kit I had fitted before. The first step is to decide on placement
of the window in the case. Make sure you are going to have clearance from
the sides of over 3cm's as well as any obstruction in the case. I have
a psu fitting over the cpu so the window had to go quite far forward.
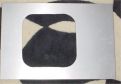
Now lay the perspex in place on the back of the side panel, mark round
it with a pen/pencil and then remove the perspex. You should now have
a nice little guide line. Now measure in 5mm from this line and draw round
(use the perspex to get a straight line and the corners perfect). You
should now have two lines one inside the other, the inside one is the
line you will be cutting to.
Now if you have done a window before you may think the instructions can
be ignored, I did but then decided I better read them just in case, boy
am I glad. Firstly because the instructions from www.coolcasemods.com
where very detailed. Also because it was quite different from the other
window kit I had fitted before. The first step is to decide on placement
of the window in the case. Make sure you are going to have clearance from
the sides of over 3cm's as well as any obstruction in the case. I have
a psu fitting over the cpu so the window had to go quite far forward.
Now lay the perspex in place on the back of the side panel, mark round
it with a pen/pencil and then remove the perspex. You should now have
a nice little guide line. Now measure in 5mm from this line and draw round
(use the perspex to get a straight line and the corners perfect). You
should now have two lines one inside the other, the inside one is the
line you will be cutting to.
Cutting the panel
 Now the fun/scary bit, cutting the hole, I used a dremmel as I am more
comfortable with using it than a jigsaw. With the dremmel you will need
several reinforced cutting disc's. You need to cut round the inside line
you measured before, with a dremmel cut slowly and let the disc do the
work. I tend to use medium to low speed on the dremmel for windows. With
a jigsaw you need to drill a hole first then use the jigsaw for the rest.
Now the fun/scary bit, cutting the hole, I used a dremmel as I am more
comfortable with using it than a jigsaw. With the dremmel you will need
several reinforced cutting disc's. You need to cut round the inside line
you measured before, with a dremmel cut slowly and let the disc do the
work. I tend to use medium to low speed on the dremmel for windows. With
a jigsaw you need to drill a hole first then use the jigsaw for the rest.
Rubber loving
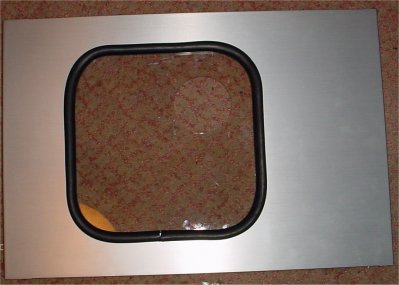
 File back the cutting line to tidy up any nasty edges left over from the
cutting process. Now its time for the fun and games, fitting of the rubber
is prehaps the hardest part of this mod. Quite simply its an absolute
pain to fit! First off peel back about 1inch of the protective film on
the perspex now fit the rubber moulding round the perspex, cutting it
to fit. Make sure you don't cut it too short or it will look silly. Now
you have to fit it into the hole in the side panel. The trick is to do
one side first then bend back the rubber as you go round to finish it
off. It is not easy an extra pair of hands is recommended.
File back the cutting line to tidy up any nasty edges left over from the
cutting process. Now its time for the fun and games, fitting of the rubber
is prehaps the hardest part of this mod. Quite simply its an absolute
pain to fit! First off peel back about 1inch of the protective film on
the perspex now fit the rubber moulding round the perspex, cutting it
to fit. Make sure you don't cut it too short or it will look silly. Now
you have to fit it into the hole in the side panel. The trick is to do
one side first then bend back the rubber as you go round to finish it
off. It is not easy an extra pair of hands is recommended.
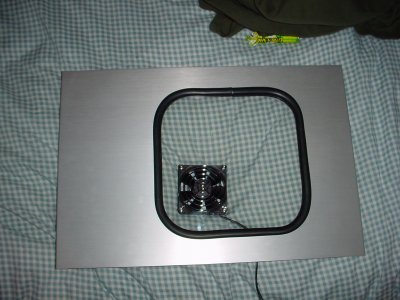
Fitting the fan
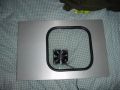 The is an easy step , just line up the fan and use the fan screws provided
to attach the fan and the grill. You have now finished the mod. Put the
panel back in your case and admire your work.
The is an easy step , just line up the fan and use the fan screws provided
to attach the fan and the grill. You have now finished the mod. Put the
panel back in your case and admire your work.
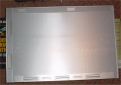
Finished
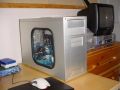 Here is a picture of the panel back in place, ideally you need at least
one cold cathode to light up the case. I have on blue cold cathode and
it is sufficient for a window of this size. Please note this window is
slighly smaller than the normal window www.coolcasemods.com
provide. I had to get it cut down due the small size of my case.
Here is a picture of the panel back in place, ideally you need at least
one cold cathode to light up the case. I have on blue cold cathode and
it is sufficient for a window of this size. Please note this window is
slighly smaller than the normal window www.coolcasemods.com
provide. I had to get it cut down due the small size of my case.
Thanks
Thanks to www.coolcasemods.com
for providing the kit. If after this guide you are still not confident
enough to do it yourself contact www.coolcasemods.com
as they will do it for you.
Conclusion
This isnt a hard mod, but people generally are scared of attacking an expensive case just in case it goes wrong. The results are definitely worth it particularly when combined with a cold cathode light.