


Preparing the hard disk
First, take your nice working Windows system, and reboot, with the Debian Sarge CD mentioned earlier in your drive. Your system BIOS should be configured to load from CD before it loads from hard disk, otherwise Windows will just load again. If things are going well, then you should get the Debian logo on the screen:
As the installer says, hit the enter key to boot, and start the installer. If your hardware is particularly recent (e.g. your hard disk is on a Serial ATA controller), then you may get better luck by typing "linux26" before pressing enter. This will ask the installer to boot using a recent version of the core linux kernel (version 2.6.5) rather than the older generation one used normally (version 2.4.26). The 2.6 series tends to have better support for modern hardware, and will be covered in more detail in part 3 of this guide.
The first question you will be asked is what language to use for the installer. Scroll up or down to the right language for you, en_GB being the right choice for me. Pick a keyboard layout, and wait for some hardware detection to finish. Next, the installer needs to know some networking settings. The hostname is the name by which you refer to the machine, much like in Windows - give the machine a unique name which will help you identify it on a network. The next screen asks what to do with disk partitions - we want to edit these manually, so select the bottom option and press enter.

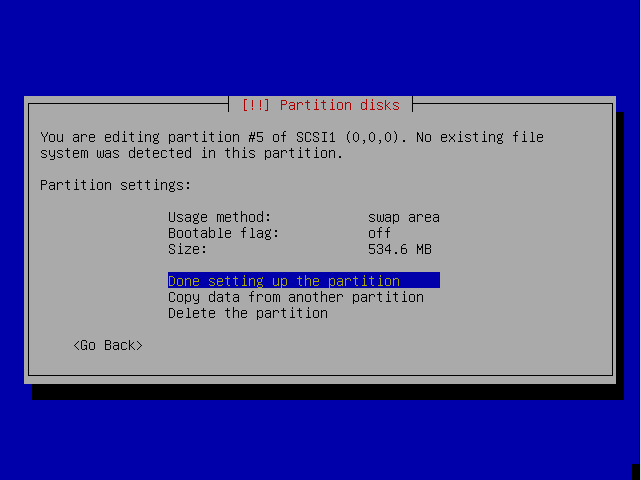
You'll see here that I have some blank partitions already created - the 512mb one is for my swap, and is the same size as the amount of RAM I'm using. the second one is for Debian itself. If you have blank space here, then hit enter on the blank space and create the swap partition, to be about the same size as your amount of RAM. Set the Usage Method on this partition to Swap Area, and hit Done:
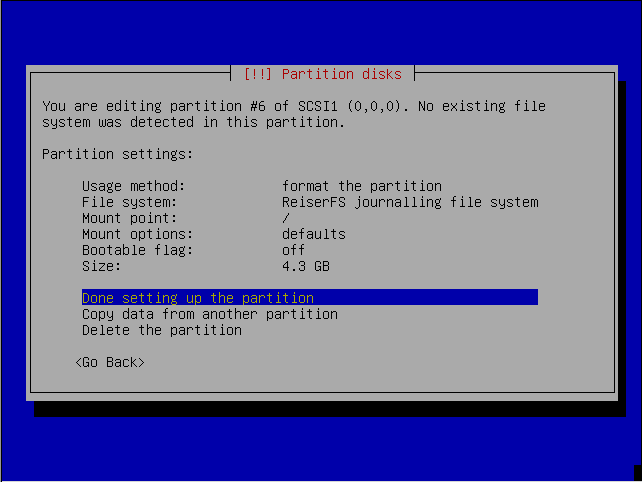
Next, for the rest. Pick "Format the partition" as the usage method, and a partition type of your choice - ResiserFS and EXT3 are the only two you should consider for a desktop system, with Resier being faster and EXT3 having greater compatibility with old applications. If you choose to have a separate /boot/ (see below), then you should choose EXT2 for it.
The Linux file structure differs from Windows' in that there is no virtual entity called "My Computer" - the "My Computer" equivalent, named "/" (slash), is actually a partition on a disk. Devices such as CD drives or hard disks reside within / - Imagine if in Windows you had a "C:cddrive" folder, or "C:soundcard". The folders within / can be real folders, or they can be other partitions - for example, on a 10gb disk, you might choose to have a 5Gb / partition, where everything will go, plus a 5Gb /home/ partition, where all user data and settings are stored, or a 5Gb /usr/ where most applications are installed. Often, people recommend a small (100mb or less) partition for /boot/, which contains the core Linux kernel and associated files. However, for this guide (and on my own system) I find it easiest just to have one big / partition (and yes, I know it's bad, I can hear people screaming at their monitors as they read that). Under the mount point setting, pick however you feel you want your system set up, as long as you have at least one partition with a mount point of /. If you're not sure what you're doing, you might want to take the single partition approach as well, until you learn which locations on your disk you use the most. For example:
Hit done, and you should have something like this:
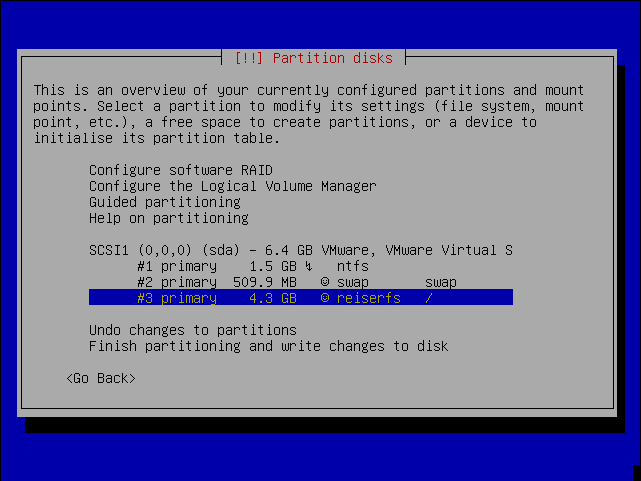
Commit the changes to disk, then sit back and wait.


