Overclocking the v3
An overclocking guide
Intro
Unlike its rival, the NVIDIA TNT2, the 3dfx Voodoo 3 does not have a stripped down alternative chip. The low cost version (2000) didn't have TV out (like the 3000) or a TV Tuner (featured on the 3500) hence the lower price. The chip was also run at a lower clock speed and lower grade
RAM was used, other than that the boards were more or less identical.
The chip itself was not as powerful as the
TNT2 series; it didn't render 32-bit colour and only supported a texture
resolution of 256x256. However 3DFX have always had a 'fill rate, fill rate,
fill rate' policy that enabled the Voodoo 3 to run at a respectable frame rate
at much higher resolutions than the TNT2.
So what? Well the Voodoo 3 2000 is well
under half the price of any GeForce based card at the moment and a TNT2 based
card for the same price as a 2000 could not compete. A 2000 may be well suited
to a super budget gaming system plus it's a real overclocker’s card.
So you've got (or may be getting) a Voodoo
3 2000 and of course you want more from it? Well I'm going to go through how you
can do just that with a much better cooling set up.
Clock Speeds
As already mentioned, the Voodoo 3 comes in
3 versions with different Clock Speeds .
2000: 143MHz
3000: 166MHz
3500: 183MHz
The chip speed and memory speeds are always
the same. e.g. 2000: 143/143.
This article will be looking at improving
the 2000 but all the ideas can be put to use in the same way on the other cards.
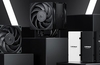
I'm using "Voodoo3 overclocker" by Gary Peterson as shown below.
You're clocking success may be limited by the quality of the RAM on the board.

How it comes
Here's the Voodoo 3 2000 as it comes in the
box. Run it at its default speed of 143MHz and it reaches quite a high
temperature (touch it and you'll know about it). The heatsink on mine was
cemented on so I couldn't remove it; some are stuck on with adhesive pads others
may have legs going through the board.
Here's a few things I've done to make it
better - you can do just one of them, or do them all like me if you’re brave.

DISCLAIMER: I will NOT be held responsible
for any damage made to hardware. You perform these modifications at your own
risk
Slot Fan
OK so it's not on the voodoo card BUT if
you're faint-hearted (and want to preserve your warranty) this is an excellent
way of getting heat away from the card and out of the case. The one below set me
back £6

Additional Fan on stock heatsink
Since I can't remove my heatsink, all I
could do was add to it. It's fortunate that an old 486 fan (there are so many
lying about, you're bound to find one from somewhere) fits very nicely on it. I
had to use screws with a wider thread to grip into the pins on the heatsink.
This is a great method of cooling and makes a real difference in temp. With just
the additional fan getting the heat away from the chip, your card could be good
for 166MHz from 143MHz.

Back side
heatsink/fan
A lot of heat can be transferred from the
backside of the PCB (facing upward in a tower case). And I say; if it's hot,
sink it! This is a little more tricky than adding the additional fan to the
stock heatsink.
Please MAKE SURE you use a heatsink that
WON'T CONDUCT electricity! You'll be applying it touching the PCB and you don't
want any shorts
1) Apply a generous amount of thermal
transfer paste to the light green square on PCB directly under the chip.

2) Place the additional heatsink squarely
on top of the green patch squishing down the paste.

3) I used hot glue to keep the heatsink in
place. Hot glue is easy to peel off should you make a mistake (unlike UHU, wood
glue or...... superglue). If you leave the card long enough however, the thermal
paste will provide quite an adhesive force (I could pick the card up with it).

RAM sinks
As you overclock the chip you'll also be
overclocking the RAM. You can help reduce heat by adding on some RAM sinks . I
made mine by quartering up a socket 7 heatsink and attaching it with 1 quarter
covering 2 RAM chips.

In the PC
Here’s the modified card set up In the PC
(minus the RAM sinks ).

Results
With all the above methods employed I run
my card at 183MHz (the same as the 3500). I'd call this a success. It will push
to just under the 200MHz mark before it starts crashing. Above 183MHz I get some
visual artifacts. It's been at 183MHz for about half a year now and is 100%
stable. I'd also like to point out that it's running COOLER at 183MHz than it
was at 143MHz with no modification.
Here are some Results taken from Quake2
Demo1. 1280x960 everything on and set to full, this'll really stretch high res
gaming.
143MHz: 31.0fps
166MHz: 34.6fps
+16% +11.6%
183MHz: 43.5fps
+27.9% +40.32%
Slightly odd. As you can see there's a
massive increase between 166MHz and 183MHz.
But I don't want a crummy Voodoo 3
Well, all of the above ideas could, with
some imagination, be applied to most graphics cards anyway. If you're on a
budget, or a mental overclocker Voodoo 3's aren't dead.