


Installation
Even the most enthusiastic subscribers to the 'Install it first, read the manual later' theory will want to take some time out to read the instructions properly when it comes to installing a water cooling kit - It's one of those things you simply don't want to go wrong. Thankfully, the manual provided by Cooler Master is very precise and clear throughout, with equally clear diagrams to boot, which should guide you through the installation process with little or no difficulty. Having said that, there do seem to be one or two moments towards the end of the instructions where points which should be mentioned are skipped over (connecting the pipes to the water block is one stand-out example) - Although the missing points are fairly obvious to figure out for yourself, a water cooling novice won't welcome the idea of having to figure these things out on their own and run the risk of doing it wrong.
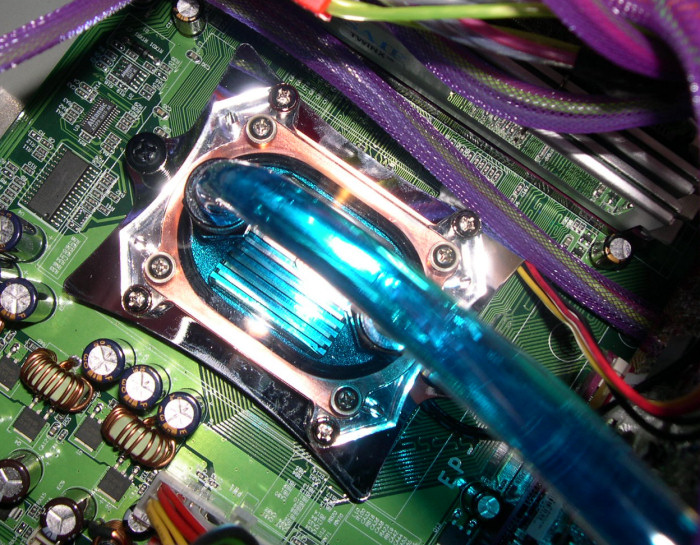
All in all though, the installation is a very simple one - Just pick out your socket type, how you want to install the unit (internally, externally or externally with an internal LCD), and then follow the relevant instructions. As with most water cooling kits, it's just a case of fitting the correct back plate to the motherboard, followed by connecting the correct retention mechanism to the water block, which then fits down tightly over the CPU.
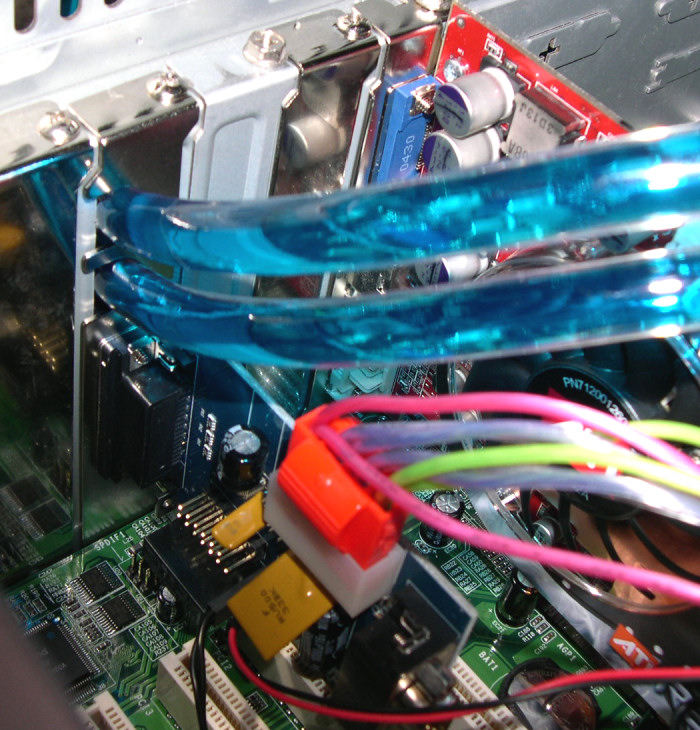
Next up, you need to fit the PCI card supplied to deal with monitoring of the unit and temperatures, as well as giving an outlet to pass through the water pipes to the external LCU if you decide to fit it that way (As we have done here). The card features a Molex connector for power, and the thermal sensor provided with the unit is also connected to this card. The PCs power switch connector is also spliced into this card via a splitter cable, so that the unit can shutdown the computer if circumstances require. Once this card is fitted, you can cut the pipes down to the correct length and thread them through the PCI card to connect them to the water block, as we have already done in these photos.
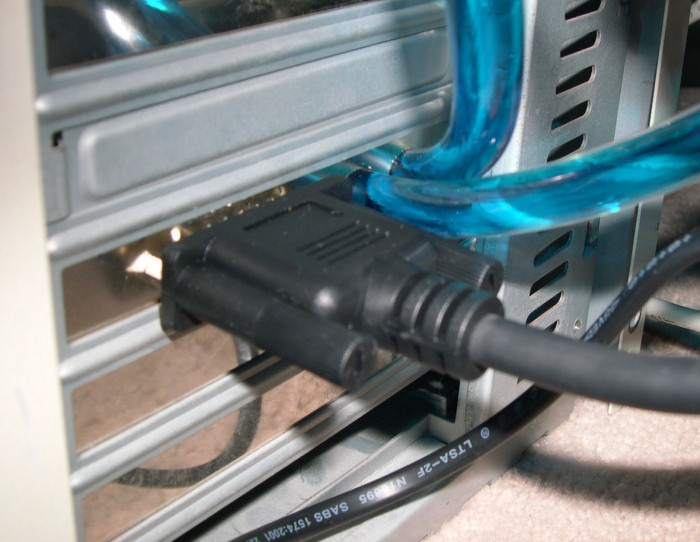
The D-bus connector used for communication between the PCI card and LCU can be connected either internally or externally to one of the card's two connectors, depending on the installation. You can see it connected to the externally placed LCU here.
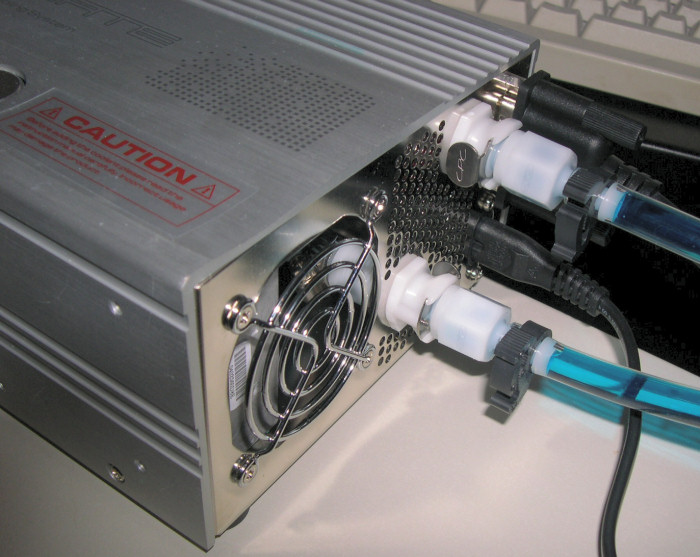
Finally, the other end of the water pipes need to be fitted with the supplied plugs and clips, which then connect to the back of the LCU. Plug the other end of the D-bus connector in to the unit, and plug it into the power using the loop-through cable supplied, and you're almost ready to go!
Filling
The final step from here is to open up the screw on the top of the LCU, and fill the unit with the provided cooling fluid. Once it's full to the top, hold your breath, count to three, and power on your PC. It should boot up and kick off the Aquagate with it, sending coolant around the system. Once it's up and running, you'll need to refill the reservoir to the top again, tilt it around a bit for a few seconds to get rid of any air bubbles, and then leave it to settle on a flat surface for five minutes. After that, you're done!
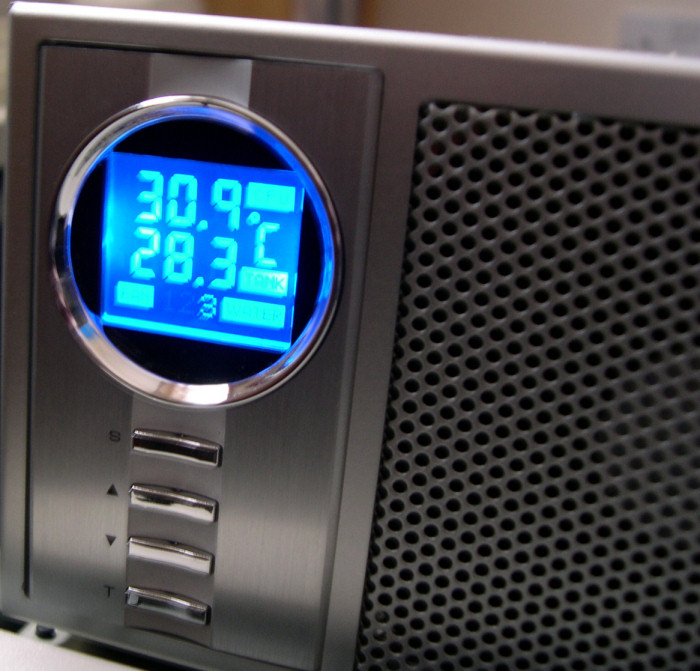
From there, all that is left if you so wish is to set shutdown levels for CPU and LCU temperatures and the like from the Aquagate's front panel. You can keep an eye on the temperature readings given by the system from the front panel LCD.
Notes
Overall, installation is as simple as you could possibly wish for. The odd omission in the instruction manual aside, you're almost literally taken by the hand and guided through the entire process, so you can't go far wrong. The tubing can be a little stiff and unwieldy, but provided you've cut them down to a decent size you shouldn't have too much of an issue with it. Everything else is simplicity itself.


