


Working with the Define R5

The upgrades over the Define R4 start at the very beginning - the door. We always appreciated the fact that it was sound-proofed, but on the 2012 case it had an obvious limitation - it would only open to the left.
For the 2014 model, hinges are available on both sides, and by undoing a pair of screws your can choose an orientation that best suits your setup. A small change, but one that will make a real difference to end users. Though, do bear in mind that the door still doesn't extend much past 90 degrees, and if your floor isn't entirely level, keeping it held open can be a slight inconvenience when regularly using optical drives.
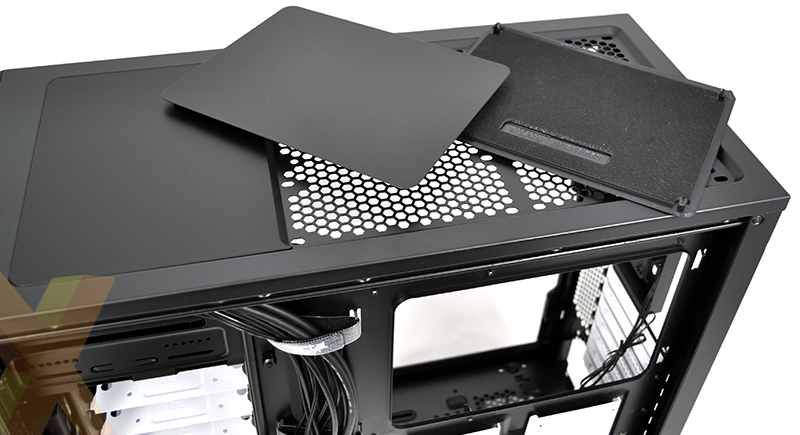
Another potential improvement are the redesigned ModuVents up top. The trio of panels are lined with sound-absorbing material and cover the top of the case when the extra fan mounts aren't in use.
Very handy when building for silence, but while the panels fit nice and snug, we did run into a bit of bother with the plastic clips that hold them in place. They aren't the strongest, and after a couple of removals two of the clips on our review sample have broken, preventing the central panel from sitting flush. Take heed: be careful when removing and reattaching the ModuVents.
What's really going to tickle the fancy of performance users is the fact that the Define R5 puts forth so many cooling options. Yes, it's designed to run quiet, and yes, there are only two fans installed as standard, but there are a surprising number of upgrade paths.
Here goes. There are three 120/140mm mounts up top, two 120/140mm mounts in front, two 120/140mm mounts at the bottom, a single 120/140mm mount at the back and another 120/140mm mount on the side panel.
All those fan-mount locations are handy to have, but Fractal takes extra care and attention by ensuring that the top mounts are offset. This means that larger radiators (up to 420mm) can be installed in the roof of the case without running into motherboard clearance issues.
 |
 |
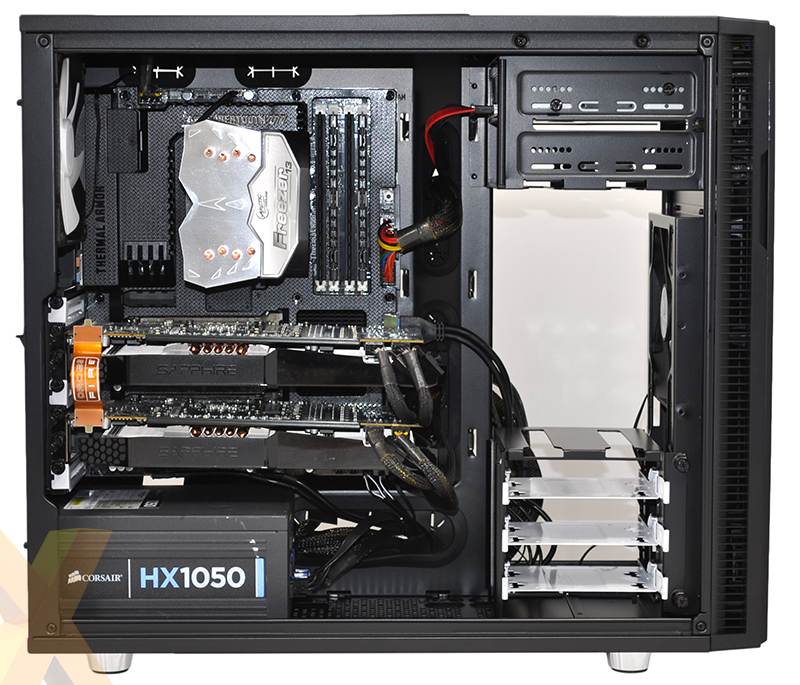
Further bolstering the chassis' flexible credentials, the storage stack is very well thought out. Taking up the right side of the interior, it consists of a two-bay optical cage at the top, a five-bay drive cage in the middle and a three-bay drive cage at the bottom.
All eight drive bays support 3.5in or 2.5in disks (rubber mounting grommets are included for hard drives), but if you're sticking exclusively to SSDs, you'll find a dedicated pair of 2.5in trays attached to the rear of the motherboard tray. Unlike the R4, which required SSDs to be installed through the tray prior to motherboard installation, the R5's dedicated white trays mean that SSDs can easily be added/removed at any time.
It's as though Fractal has taken all the feedback from the R4 and made as many improvements as possible. Take for example the optical-drive cage, which is now detachable and ensures that the entire storage column can be removed to make way for radiators and reservoirs. What's also helpful is that the hard-disk cages can be moved to the top, meaning those who won't be using optical capabilities could ditch the 5.25in cage, move the hard disks up and leave room at the bottom for, say, a thick 240mm rad. There are a lot of possibilities.
Heck, we've gotten so caught up on the internal improvements that we forgot to mention one of our favourite external upgrades - the main side panel is now latched, giving users quicker/easier access to the internal cavern. The mechanism isn't quite as elegant as a push-to-release button, but there's a small lever that when pushed down releases the door (just remember to catch it as it can come away sharpish). Optional thumb screws can also be attached to keep it secure, and the whole setup ultimately works. We also love the fact that both side panels are hinged as opposed to notched, so they're easy to attach.
 |
 |
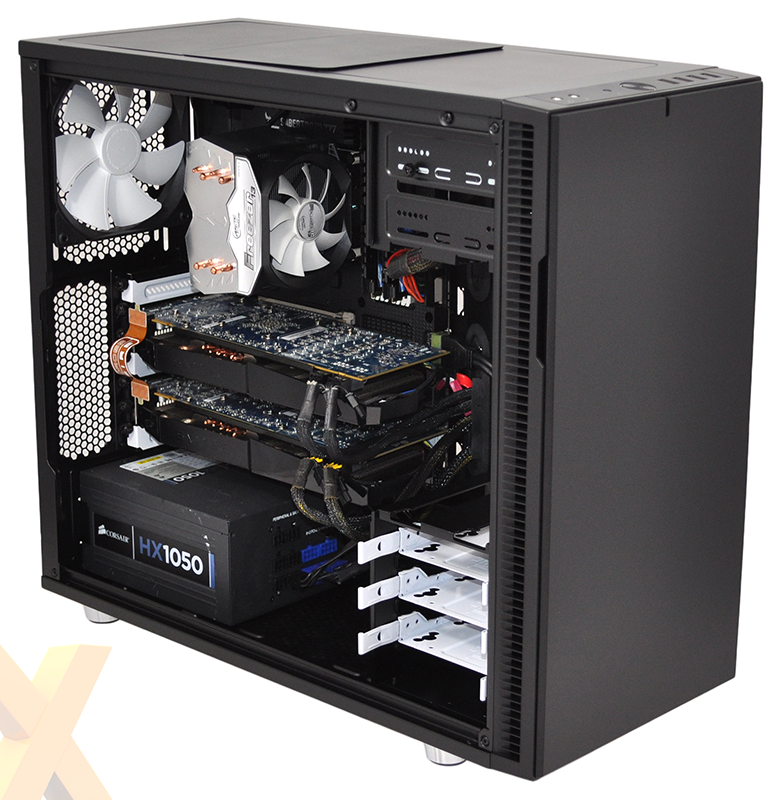
Our dual-graphics Z77 test platform slots in very nicely, with no major issues of note. There's plenty of clearance (up to 300mm for PSU, 440mm for graphics and 180mm for a CPU cooler), and cable management is well catered for.
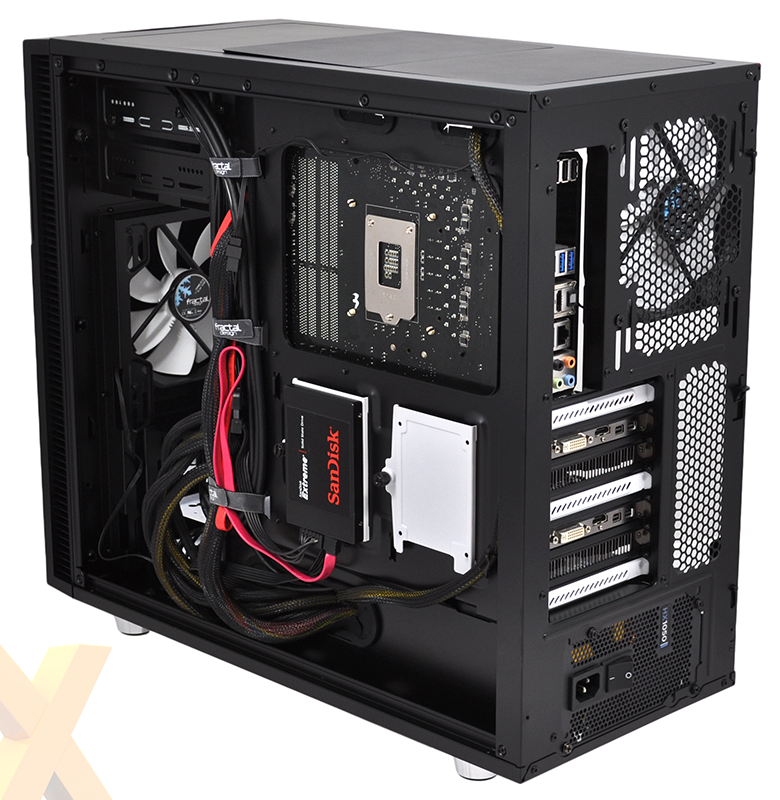
You'll find two small holes above the motherboard tray for up-and-over cables (these might have been a tad larger), a spacious opening next to the PSU bay and a pair of angled openings alongside the motherboard tray. All five are rubber-grommeted, but the grommets aren't the best we've seen - they do move around a bit and can come loose when too many cables are pushed through.
We didn't have any problems keeping the test platform looking tidy, mind, and that's thanks in no small part to the three Velcro cable straps pre-attached to the rear of the motherboard tray. Again, a simple upgrade over the R4, but one that makes a lot of sense.
Downsides? Well, there are a few. The drive bays (optical and hard disk) aren't tool-free, which can be an inconvenience, and the built-in, three-step fan controller is handy to have but only supports up to three fans, and that isn't a lot considering how many fan mounts are available. Plus if it's maximum air-cooling performance you're after, you may be disappointed to find that only two fans are included as standard - a 140mm front intake and a 140mm rear exhaust. Both are three-pin Fractal Design Dynamic GP14 fans capable of running at up to 1,000RPM, but a third bundled fan would have been preferred at this price point.
A third removable dust filter lining the top of the chassis would also have been a neat addition, as would pre-installed motherboard standoffs, but we are now nitpicking. Provided you don't break the clips on the top ModuVents (you can see the resulting problem in the pictures above), the Define R5 is generally excellent to work with.


