


SLI up close and personal
So when building an nForce4 SLI system, as you'll probably have seen already, you'll need four things. The SLI mainboard, an ASUS A8N-E SLI in my case, the board pairing, the continuity connector and the inter-GPU connector.Continuity connector
The continuity connector for nForce4 is the first interesting thing. Here you can see it installed and in SLI mode. Turning it around and placing it back in the slot undoes the PEG16X-to-PEG8X slot remap. On Tumwater, it's done inside the MCH.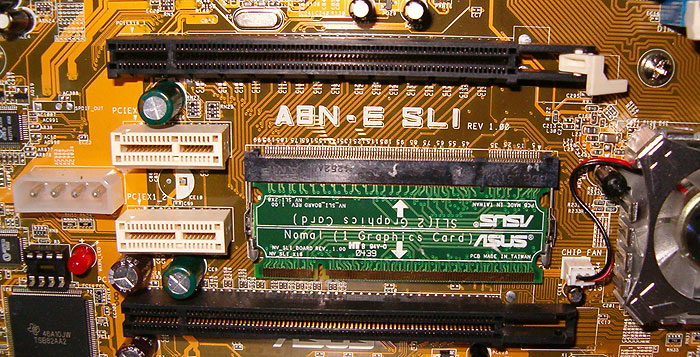
It's the little green PCB in the small slot between the two PEG16X electrical slots on the mainboard. Here it is up close.

You can see it marked clearly so you don't get the two modes of operation mixed up.
The boards and inter-GPU connector
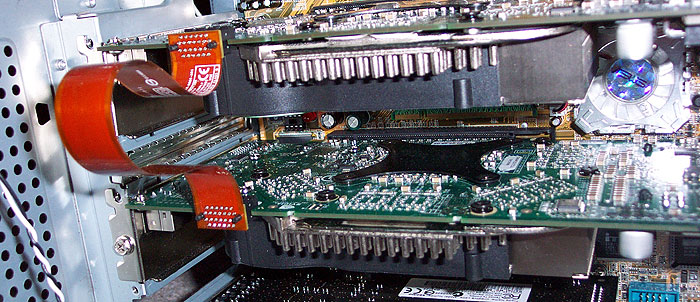
The boards are self explanatory, other than the fact that they currently need to share BIOS revisions and have the same basic GPU properties. I tried using 6800 Ultra and 6800 GT in the same system, and 6800 Ultra and 6600 GT, without any success. The system would either refuse to boot or just see the primary device. The connector between the two boards is interesting.Bundled with the mainboard, NVIDIA have recently informed board partners that it must be a PCB-based connector. In current SLI systems being evaluated by the likes of me, using nForce4 SLI, the connector is a ribbon-based example. You might have seen the connector between boards on Tumwater systems in the past, where it's a small PCB. Since the slots are further apart on nForce4 SLI, that connector no longer fits and you need something longer. Ribbon connectors are seemingly an interim solution, as NVIDIA require a PCB connector for whatever reason. I'll show you both, starting with the smaller Tumwater connector and then two pictures of the ribbon connector from a couple of different angles.


Putting it all together
It's as simple as you'd imagine. Make sure the continuity connector (if you need one) is round the right way. Install the two boards and then connect them with the inter-GPU connector. Plug in power cables, power it all on, install a driver.Imagine you've done that. Now let's see why the inter-GPU connector is needed and why the performance overlay is a useful tool.


