


Installation
I'll be brief again. My page on the installation of the KT12-L20 has almost everything you need to know about setting up a KT03A-L30. Find that page here. Keep the section on GPU block installation in mind, even though the review sample doesn't ship with one, since it's a very popular addition to almost all WaterChill purchases according to Asetek. The chances are you'll be looking to pick one up.There are a couple of crucial differences to bear in mind though, with regards to fitting a KT03A, versus the method you use with a KT12. Firstly, the L30 pump means a slightly different reservoir installation, in front of the pump. The bracket is supplied, but it's trickier to use in my opinion. Filled with water, you really need to attach the pump to your case with screws, the weight of the pump/reservoir assembly liable to tip it forwards, the reservoir making it nose heavy.
Secondly, the newer tubing makes all my comments on the older tubing irrelevant. The new stuff is good, the old stuff is bad, that's all you need to know. No problems these days.
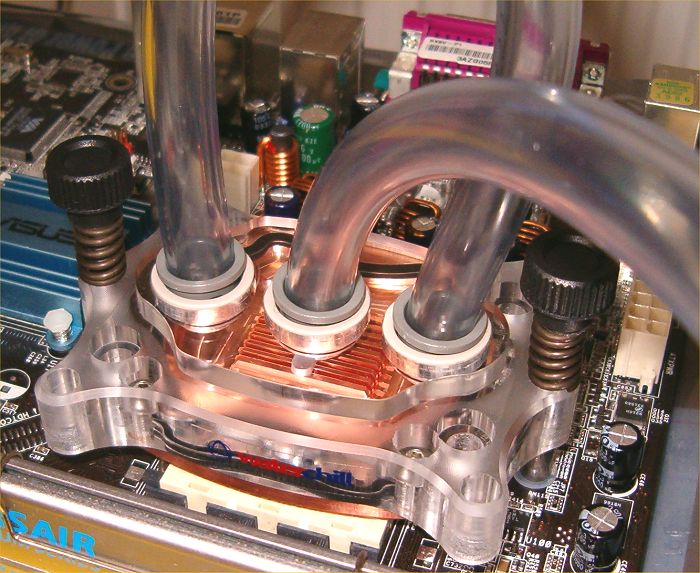
Finally, the Antarctica block is different. With two coolant outlets, how do they fit in with the rest of the installation?
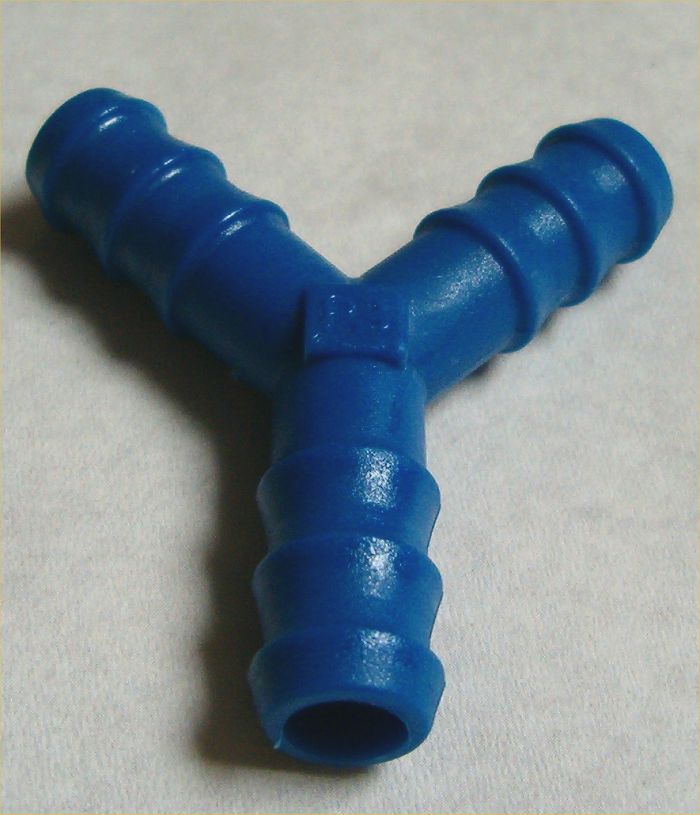
The Y-pipe combines the outlets into a single line, following the coolant's exit from the waterblock. You can clearly see it in action in the following shot of the system, prior to my leak testing.
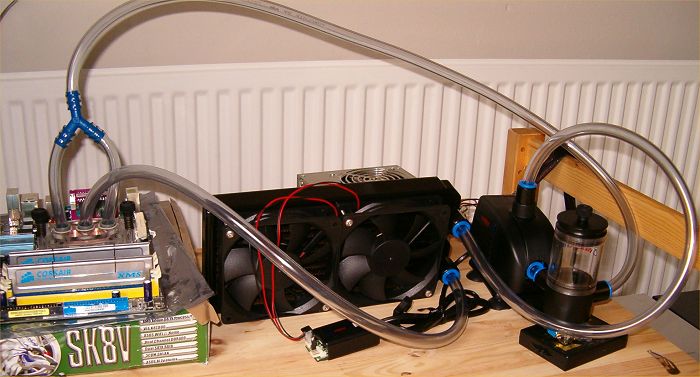
Reservoir to pump, pump to radiator, radiator to waterblock, block to reservoir. One closed loop watercooling system. The waterblock attaches just the same as it did before. You screw in two or four retaining bolts to your motherboard, depending on the CPU you're cooling, replacing the heatsink mounting mechanism usually supplied. Then you place the block over the bolts, before retaining the block to the bolts using spring-loaded hand tightening screws.
Filling the system
While the Hydor pump still isn't self priming, pumping fresh air for all it's worth when you turn it on, it was significantly easier to fill the KT03A system than the KT12. The lack of GPU block and larger pump are the reasons why, the Hydor L30 not taking long to get the rest of the system filled with coolant. About 10 minutes max, including testing to make sure no air bubbles were present.Overall
Great tubing, a bigger pump, and the same intuitive mounting mechanism as before, all combine to make installation of a KT03A no more involved than that of an aftermarket air cooler. A breeze, provided you're patient and can follow the excellent instructions.Performance now.


