BIOS
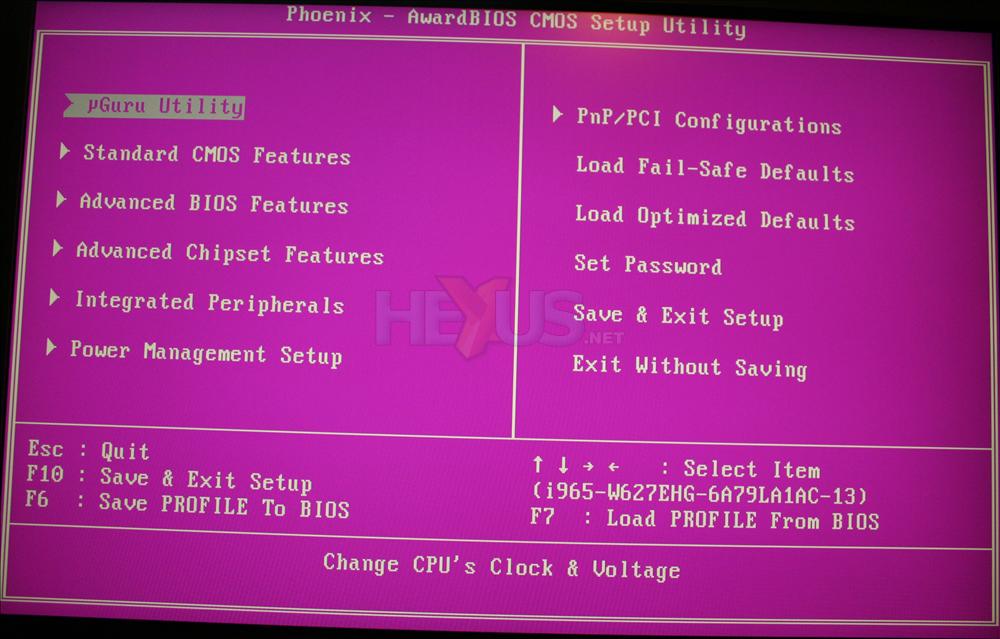
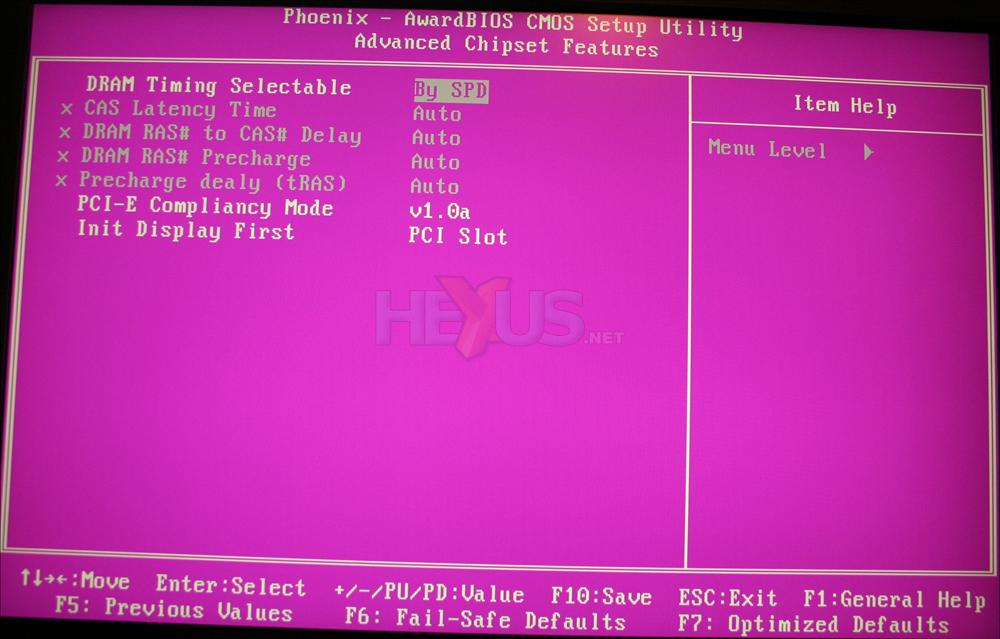
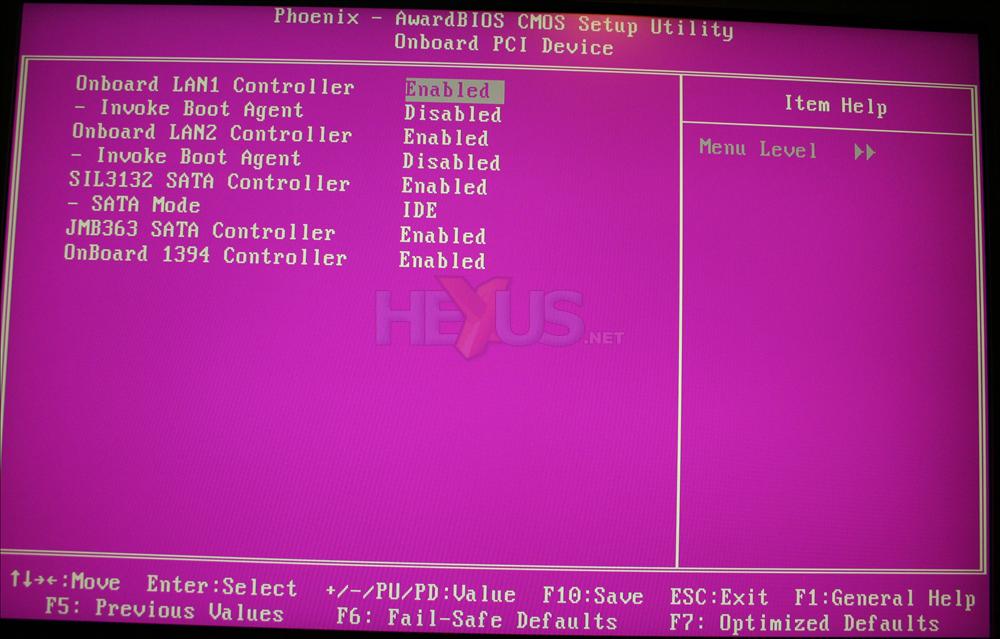
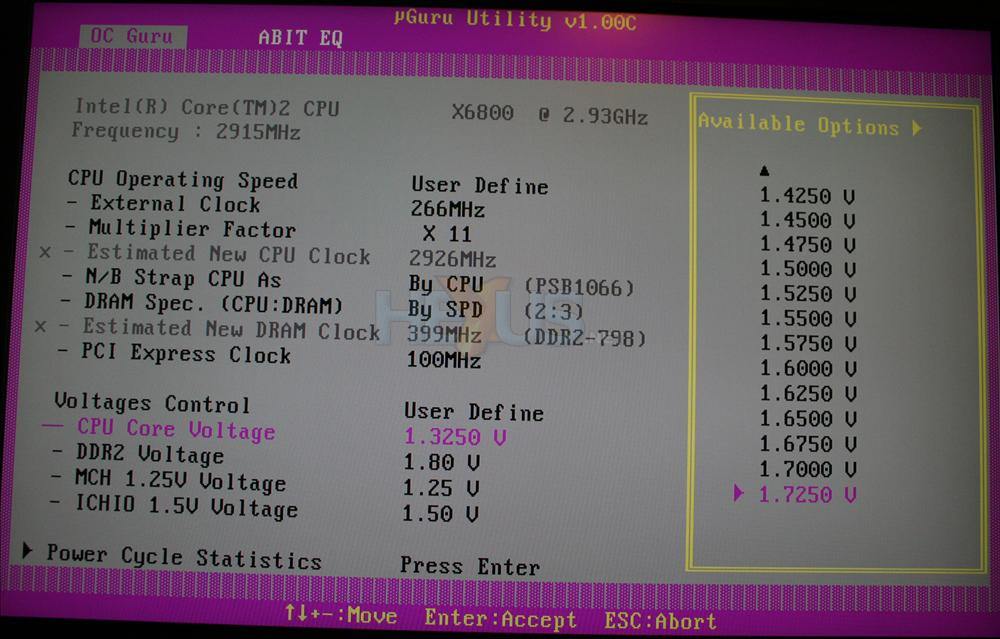
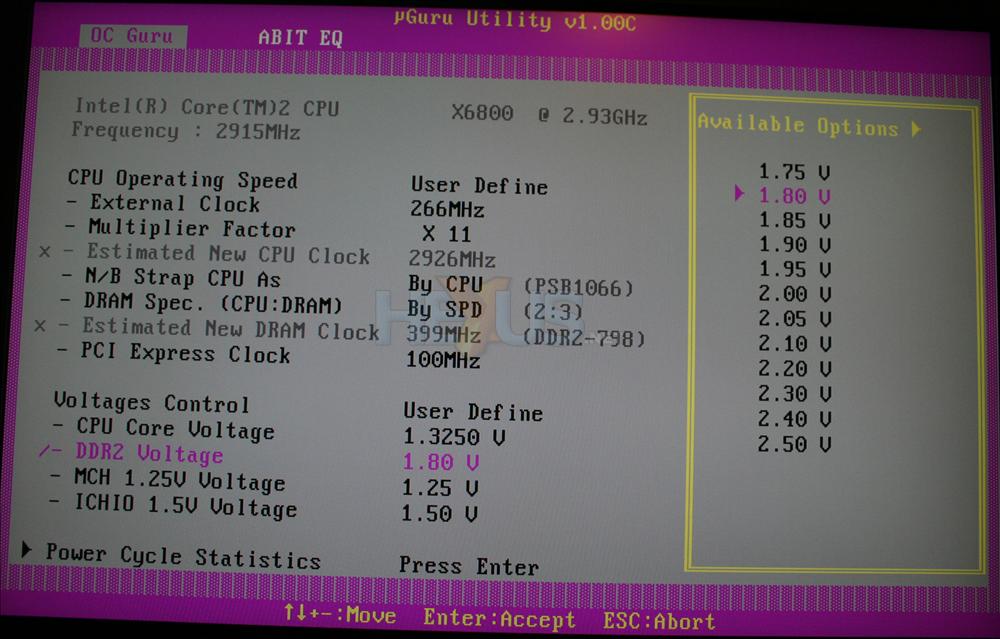
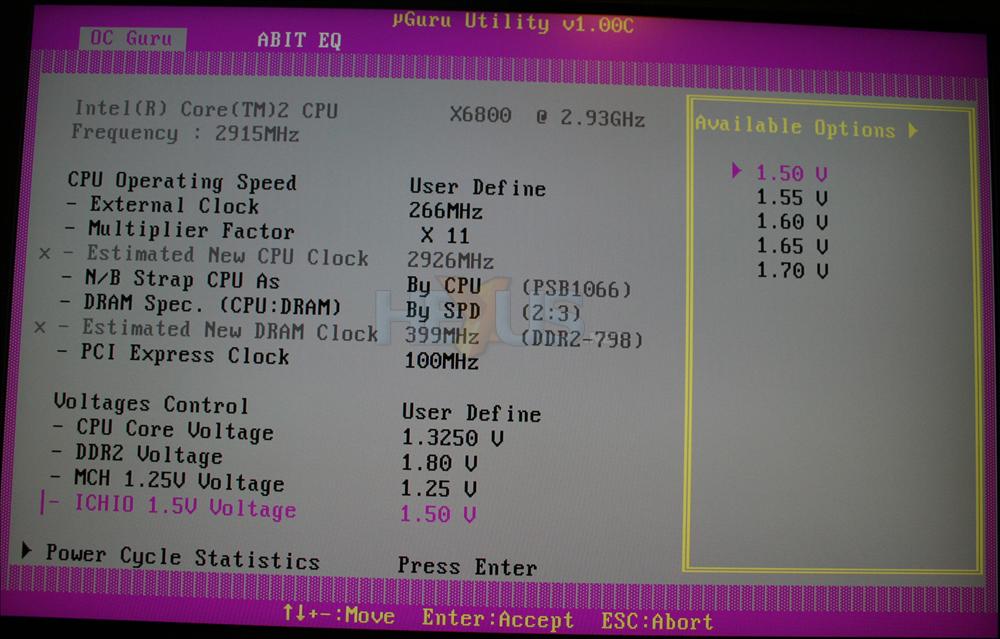
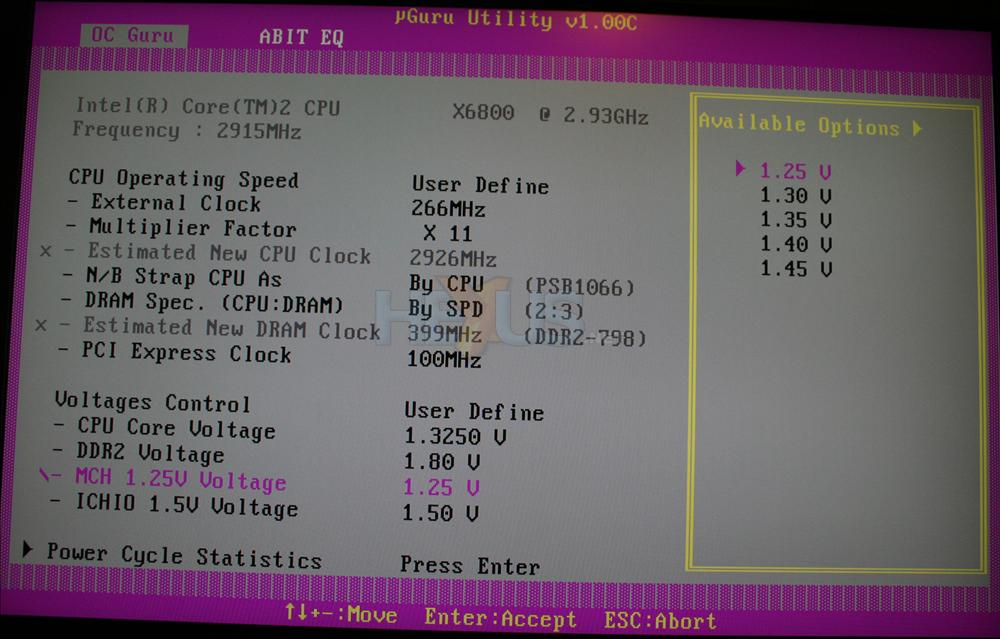
Most of you are probably experienced enough to know that a loose cable between graphics card and display can mean some funky things on screen. For me, the funk is usually manifest in one of the colours being missing so the entire image looks blue, green, or whatever. First time the AB9 Pro was fired and the BIOS was brought up the check the config and take photos, I instinctively wondered if the cable was hooked up correctly. You'll see why.The BIOS is, predictably, quite a lot like the one we saw with AW9D Max. The µGuru screens are where you'll spend almost all of your time, with small trips out to the usual screens to adjust memory timings and turn on and off on-board devices. Here are the main adjustment ranges you get.
| Item | Adjustment |
|---|---|
| CPU bus frequency | 133 to 600MHz in 1MHz steps |
| DRAM frequency/multis | DDR2 533/667/800MHz |
| CPU voltage | 1.3250V to 1.7250V in 0.0250V steps |
| DRAM voltage | 1.75V to 2.50V in 0.05V (0.10V at the upper end) steps |
| PCI Express frequency | 100 to 200MHz in 1MHz steps |
| P965 MCH voltage | 1.25V to 1.45V in 0.010V steps |
| FSB voltage | N/A |
| ICH8R voltage | 1.50V to 1.70V in 0.05V steps |
| CPU boot FID adjust | Yes; depends on CPU |
| CPU boot VID adjust | Yes; depends on CPU |
| Intel Speedstep Control/EIST | Yes |
Discussion
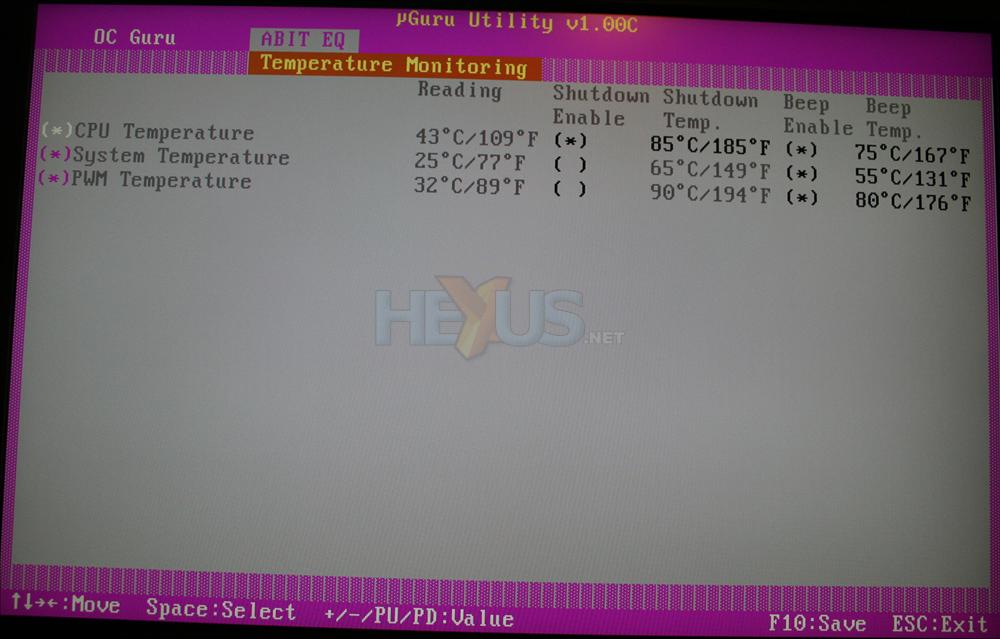
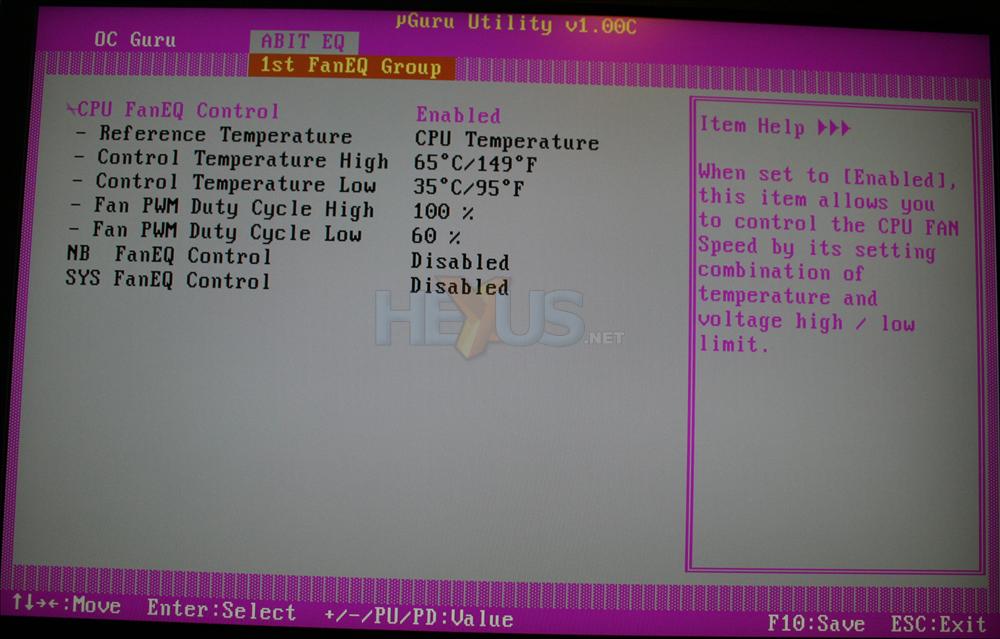
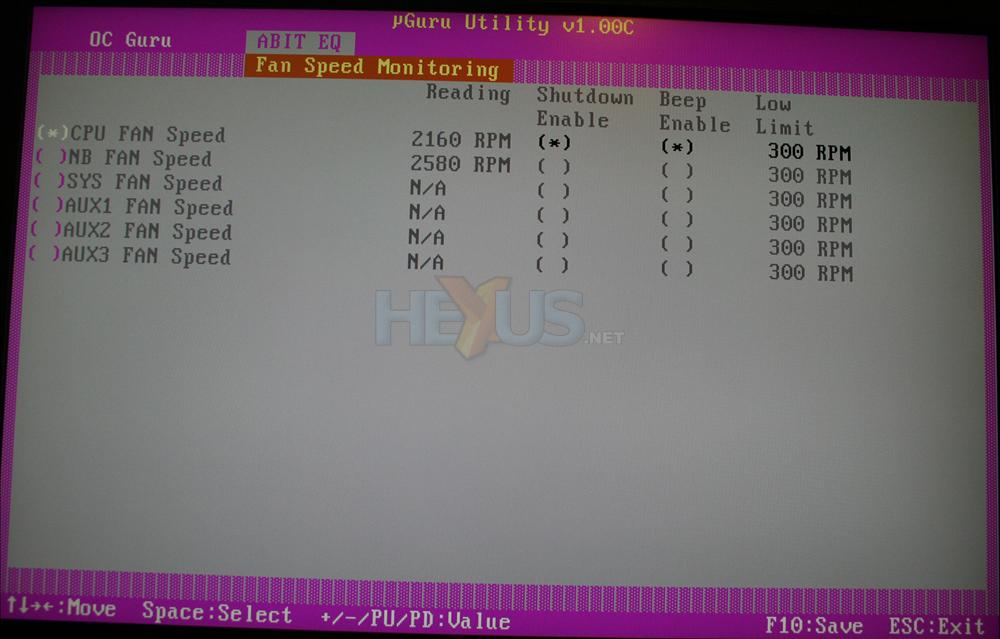
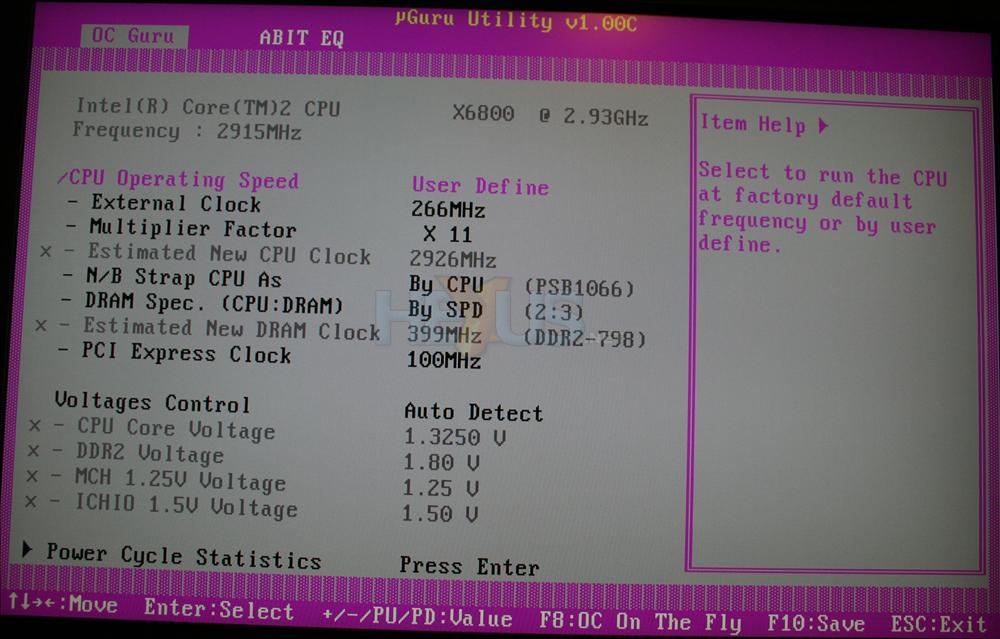
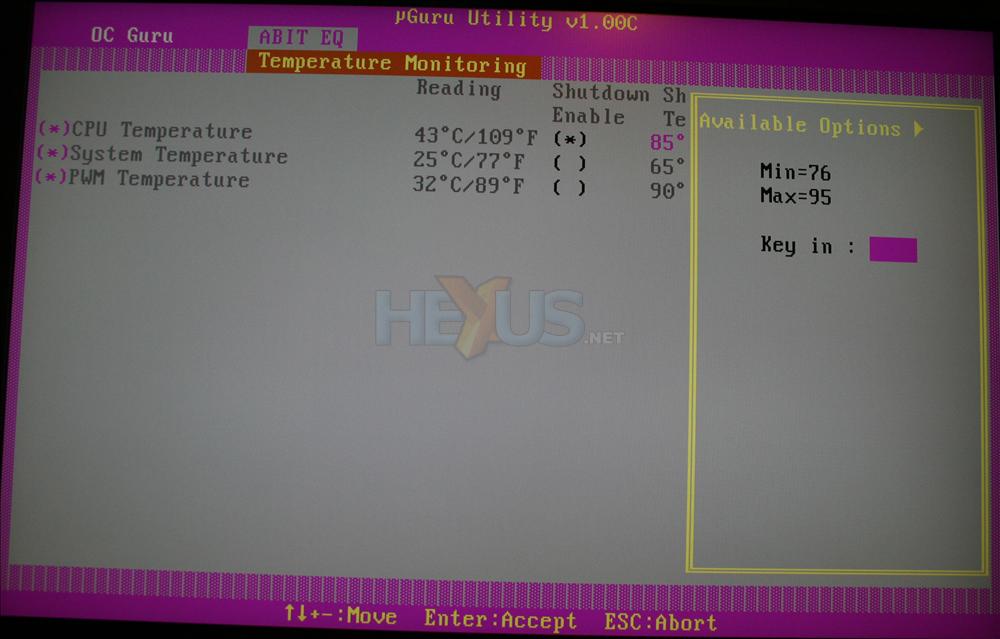
To save us some time we'll refer you again to our comments on the AW9D Max's BIOS since they very much apply here, bar one or two implementation-specific details like controls over fan headers.The ABIT EQ section is simply peerless when it comes to in-BIOS monitoring and adjustment. Fan control is supreme and you'll struggle to find fault with FanEQ when it comes to fine-grained adjustment. The OC Guru section calculates new clock values for you before you set them, and you can adjust certain settings on-the-fly, to see if they'll stick without a reboot.
All in, the BIOS is as good as we've ever seen on a mainboard when it comes to actually using it, with other mainboards only outdoing it in terms of adjustment ranges. We ponder the choice of colour though, as you'll see and as we referred to earlier. What follows is a gallery of images showing you adjustment ranges and the BIOS layout, to get a feel for it before you think about any possible purchase.
Image Gallery