Koolance PC2-C
|
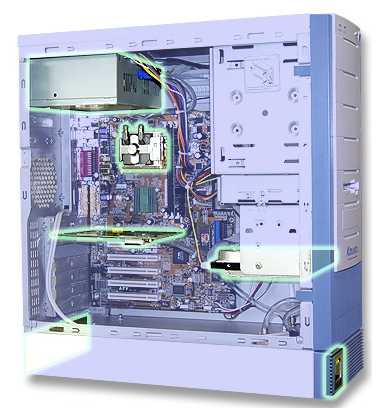 As you can see from the picture the special components are highlighted in glowing green. The radiator was located at the bottom of the case with 3 exhaust fans blowing out the back. There was also a small LED read out located at the front of the case in the bottom left corner. The original Koolance wasn't as well excepted as possibly it should have been, they were taking a large step forward and trying to make water cooling a main stream cooling solution when water cooling at the time was confined to pretty much a DIY environment for people that required extreme cooling measures. Koolance PC2-C - Case Overview The new Koolance PC2-C Case while visually similar also has some very obvious changes. You can take a look below at the picture from the Koolance website: 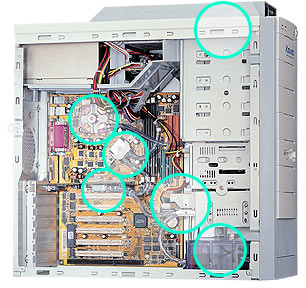 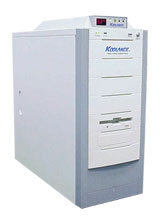
The most obvious change here is the new inclusion of the top module. In this respect the Koolance has been completely redesigned as this now houses the radiator plus a few more goodies. On the top you can see two in take 80mm fans and one exhaust 80mm fan as well as a LED displaying CPU temp at the front. Beside this there are two buttons. The first button changes the temperature display from Celsius to Fahrenheit, the second changes the speed of the radiator fans. 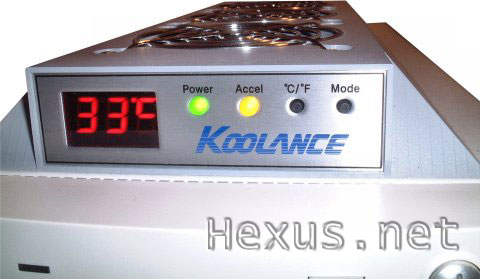 There are 3 modes that are provided. They are all based on user preference on a sound to performance ratio. The first mode runs the fans at 45%, the 2nd mode run the fans at 45% until the CPU hits 40c and then runs the fans at 100%. The 3rd and final mode runs the fans constantly at 100%. All these functions are controlled by a custom designed on board controller. This is also housed at the top just behind the PSU and in front of the Radiator.  Click The Picture Above to Enlarge As you can see in the picture there are four fan headers but only 3 are taken up. Koolance cleverly anticipated the need for perhaps a fourth and included the option to expand to an extra fan
which will still be controlled by the on board controller circuit. 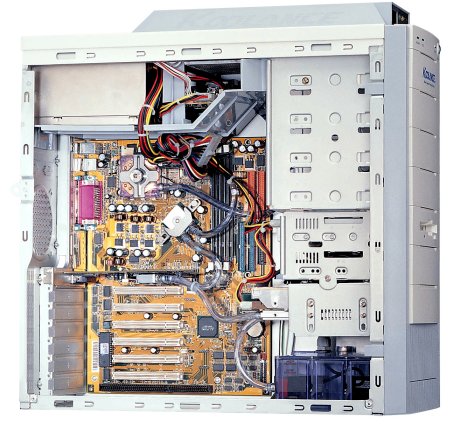 Koolance - First Impressions I ordered the barebones PC2-C Koolance system. This meant no PSU and only CPU water block, reservoir and radiator. After opening the large box and taking the Koolane PC2-C case out of its well packaged box I took my first look inside. I was surprised to discover that all the tubing was already connected. The Reservoir plus all the radiator connectors come pre-crimped as well as one of the CPU water blocks nozzles. The other nozzle was connected but not crimped. This was done on purpose to allow for upgrades and add-ons. As I mentioned before I ordered the bare bones kit with a single extra item which was a motherboard chipset water block for my Geforce3. Needing the chipset waterblock for the Geforce3 is specifically mentioned on the Koolance website. This is due to the bent connectors that allow clearance over the Geforce3 components. Where as the normal graphics water block is made with straight connectors. Please see the pictures below for the two types. 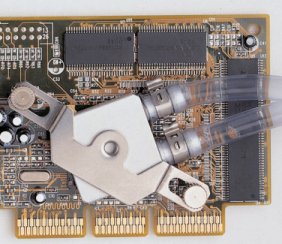 Video Card Pic from Koolance website 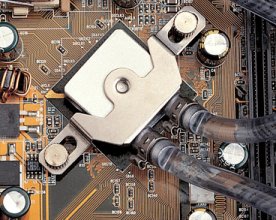 Motherboard Chipset Pic from Koolance website The CPU water block came taped to the inside of the case but with a plastic covering to protect the bottom of the block. The block itself came with a highly polished copper base and a transparent acrylic top. This is the first time I have seen water block with this design. 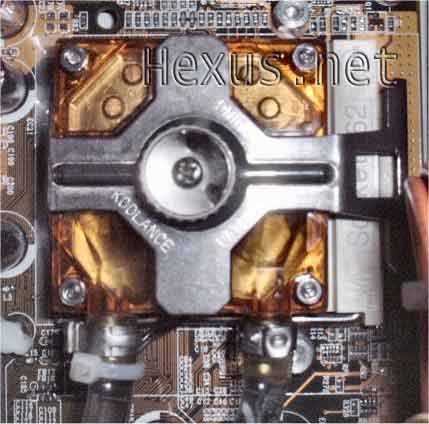 My first impressions of the water block were of mixed feelings. It has a completely different design and a different theory behind taking the heat away from the copper base than other water block designs, such as the Danger Den Maze style blocks. The danger den blocks work by moving the water through a specific pathway starting from the centre and moving out in a spiral. As you can see in the picture above the water on the Koolance CPU water block is pumped in one side and pumped out the other. The entire base of the block is open to the water with small spikes sticking up from the bottom creating turbulence in the water and a larger heat transfer contact area. As I mentioned I was quite sceptical about this design as water can simply go straight from the "in" to the "out". Meaning the water further away from the entrance/exit joints is moving slower. Another addition that I immediately noticed when closer examining the water block was a temperature probe directly underneath the copper block and slightly sunk in. This will obviously show a far more accurate temperature than the motherboard readout. 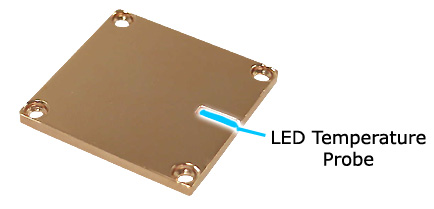 |