


The Interior
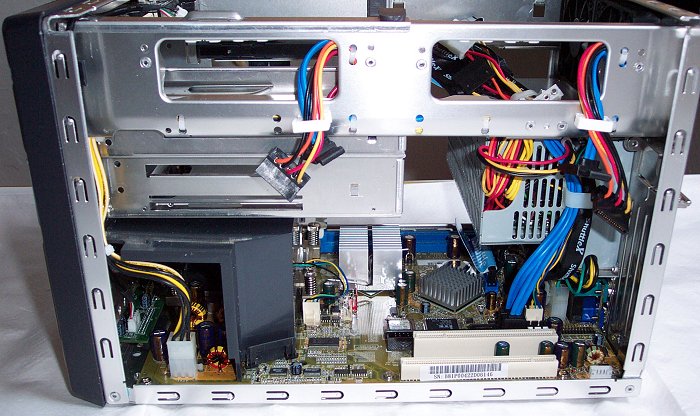
Click for a larger version (89KB)
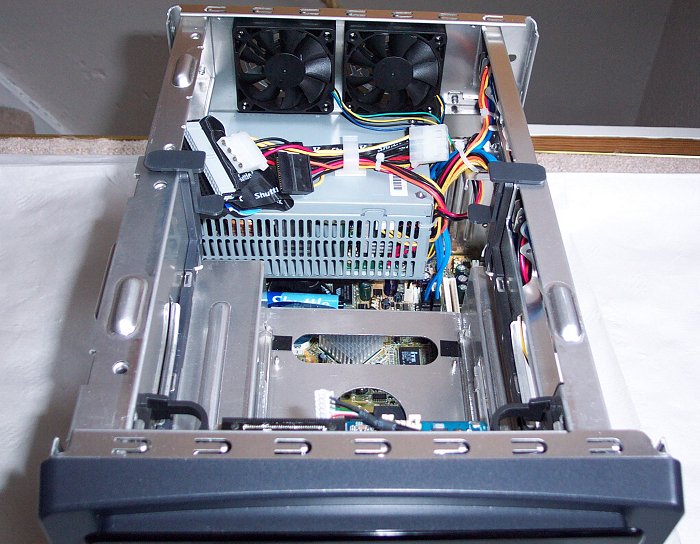
Lifting the lid off and taking a look in from the right hand side gives you a good look at how the SB81P is set out internally. You can see the integrated cabling, preset for your device configurations and routed to the right parts of the case. Note the SATA power and data cable pairs at the top, for feeding the new drive area up there.
A closer look inside with the drive cage removed is worth it. You can check out a top view before we do so.
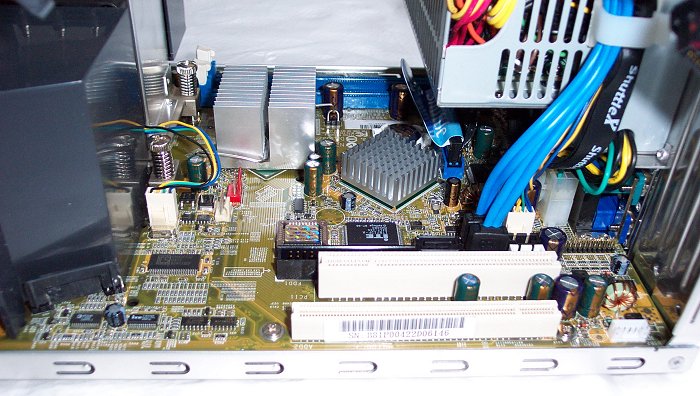
Click for a larger version (87KB)
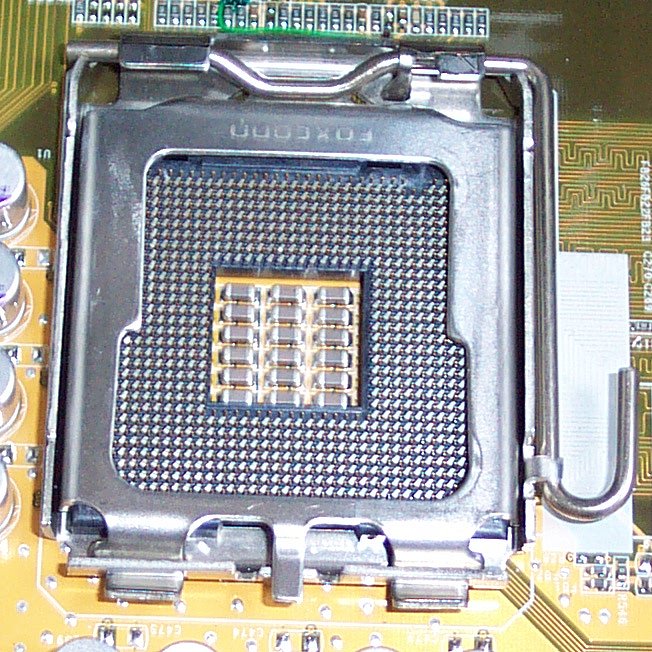
Getting in a bit closer from that right hand side, with the cage removed, lets you see a bit more of the internals. On the left you can just about see the removable plastic duct that helps feed air to the CPU cooling area. The mounting hardware for the ICE cooler is just about visible too. Then you can see the passively cooled north and southbridge chips (i915G and ICH6/R) under slim aluminium heatsinks.
There's also an IDE cable preinstalled, the floppy port hiding behind the PCI and PEG16X PCI Express port, four SATA ports in a nice grouping behind those. The power connector is from from the PSU you can see hanging over the motherboard on the right. And from the other side....
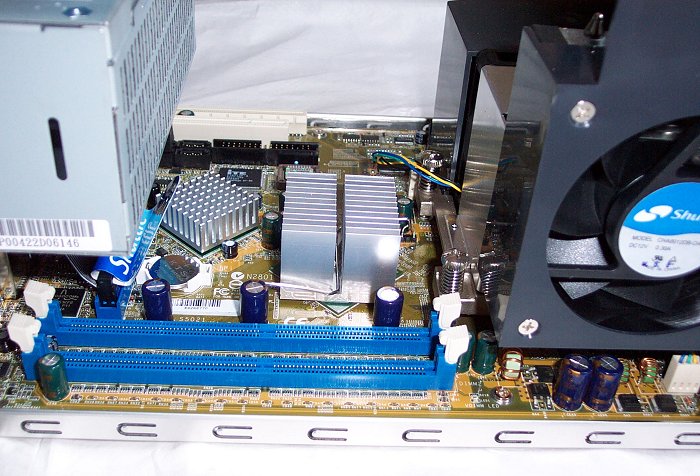
Click for a larger version (95KB)
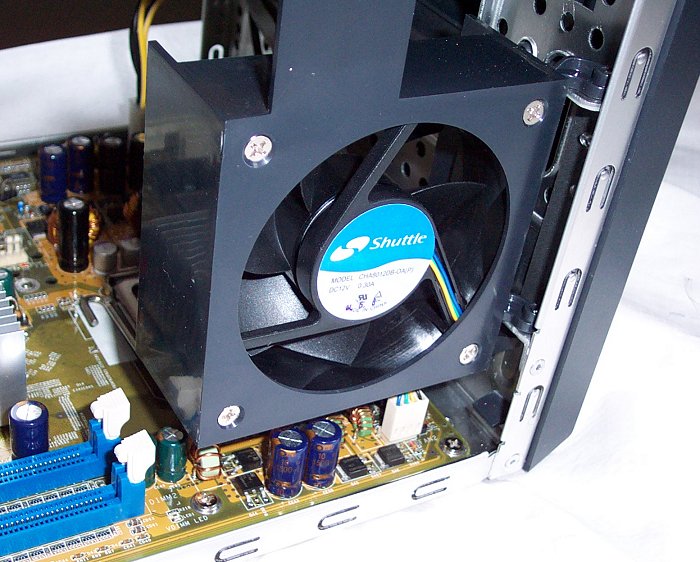
A pair of DDR DIMM slots round things out from a main motherboard point of view. You can see the CPU cooling area on the right, with the exhaust fan shrouding the ICE cooler which is fed air from the duct in front of it. Here's a closeup of that area.
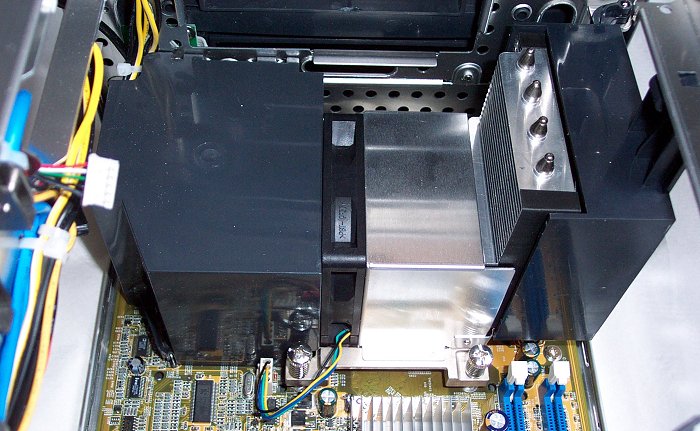
Click for a larger version (83KB)
Shroud on the left feeds cold air from the outside of the chassis, which is pulled over the ICE cooler by the ICE cooler's fan, before being dumped out of the case on the right by the exhaust fan in its own shroud.
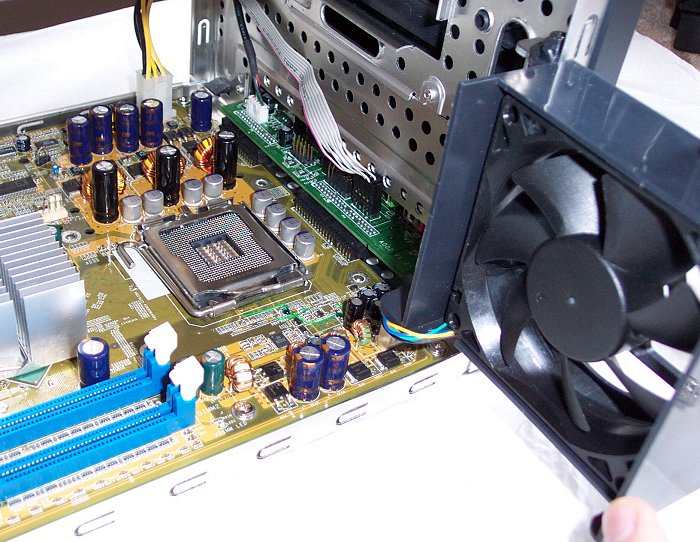
Installing the ICE cooler is simple. Remove the shroud on the left by pulling up and out. Unscrew the ICE cooler from the motherboard using its four screws, exposing the CPU socket. Install your LGA775 CPU after pulling the side exhaust fan out of the way to give yourself more room.
Then replace the ICE cooler using a large Philips screwdriver to help you get the screws into the motherboard. It requires plenty of effort, so be firm but steady.
I'll cover the new ICE cooler separately soon. Onwards to the rest of the interior, including fitting drives.


