


Internal Appearance
The Fusion is made out of 0.8mm cold-rolled steel all round with the exception of the front panel and you can easily tell, it’s not light by any means, tipping the scales at 7.8kg (net).The Fusion is designed around a three-chamber philosophy much like its bigger desktop brother the P180, not only does this aid its thermal capability but the rigidity of the entire chassis is greatly improved too.
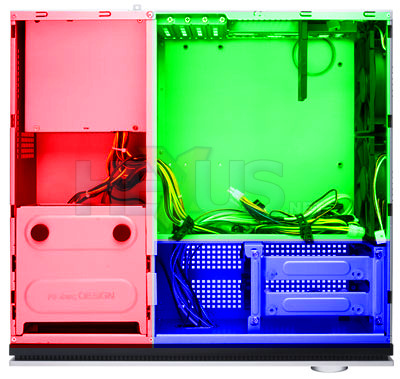
The front right of the chassis features space for two hard drives which are mounted vertically in foam padded plastic cradles. Once in place the hard drives are secured using a steel brace which features rubber grommets to further improve the acoustic performance of the chassis.
Click for larger image
Flipping the Fusion upside-down reveals four rubber grommets for securing the other side of the hard drives in place, in addition to this you get a good look at the vents that are cut out of the underside to aid heat dissipation.

Click for larger image
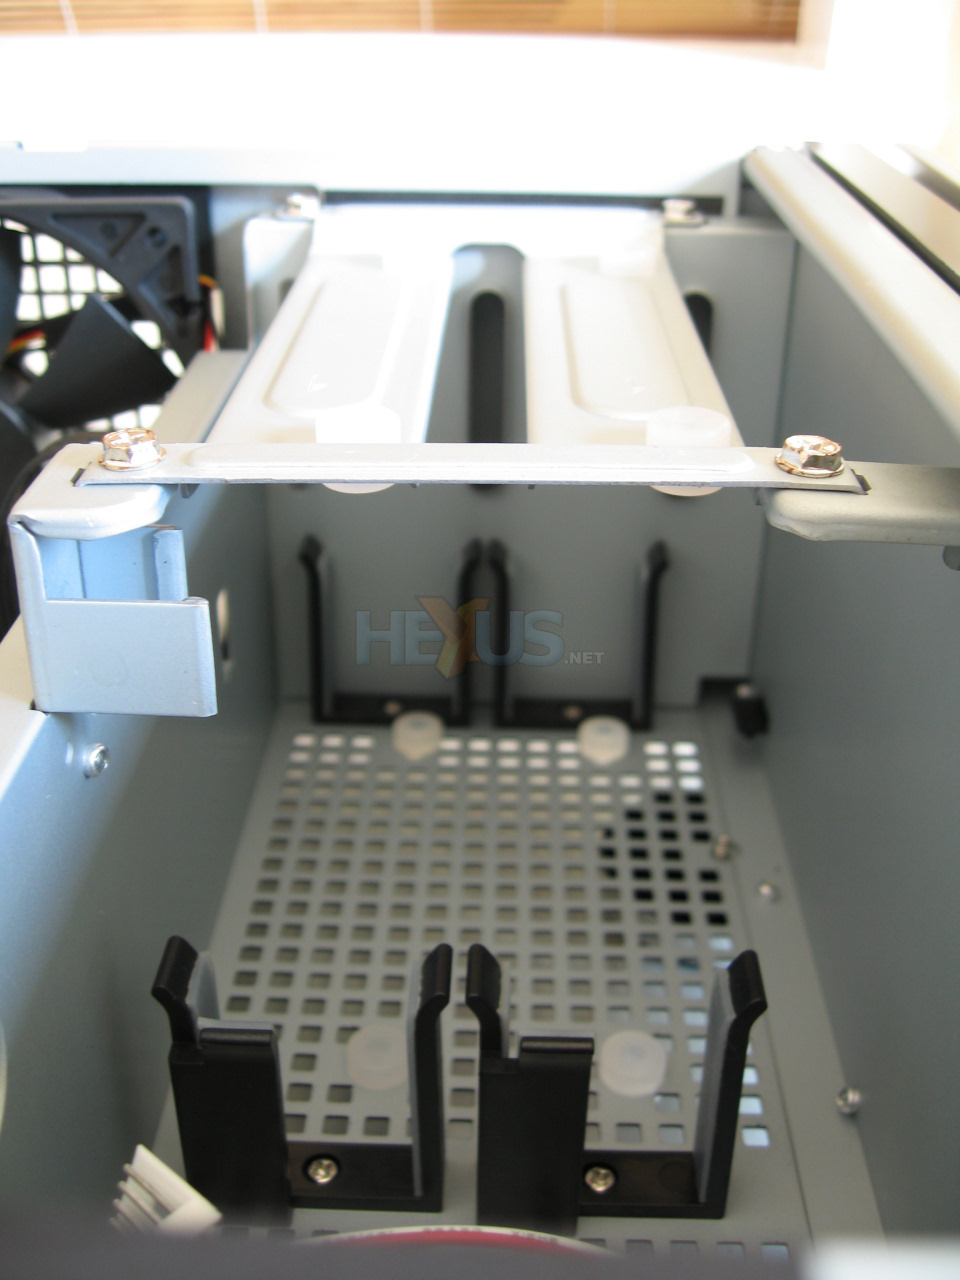
Behind the VFD on the front left of the chassis we find the 5.25” cradle that allows you to fit a single optical drive – the important thing to note here is that this is located behind the VFD, therefore you can only ever put one optical drive in the Fusion chassis, by utilizing a 5.25” to 3.5” bay converter you could conceivably mount a third hard drive should you so wish.
Whilst you have to screw in any drives you place into the rack, the rack itself is a screw-less design, with a simple click and slide motion you can add/remove the rack itself with ease, a very simple, but extremely effective mounting solution.
Click for larger image
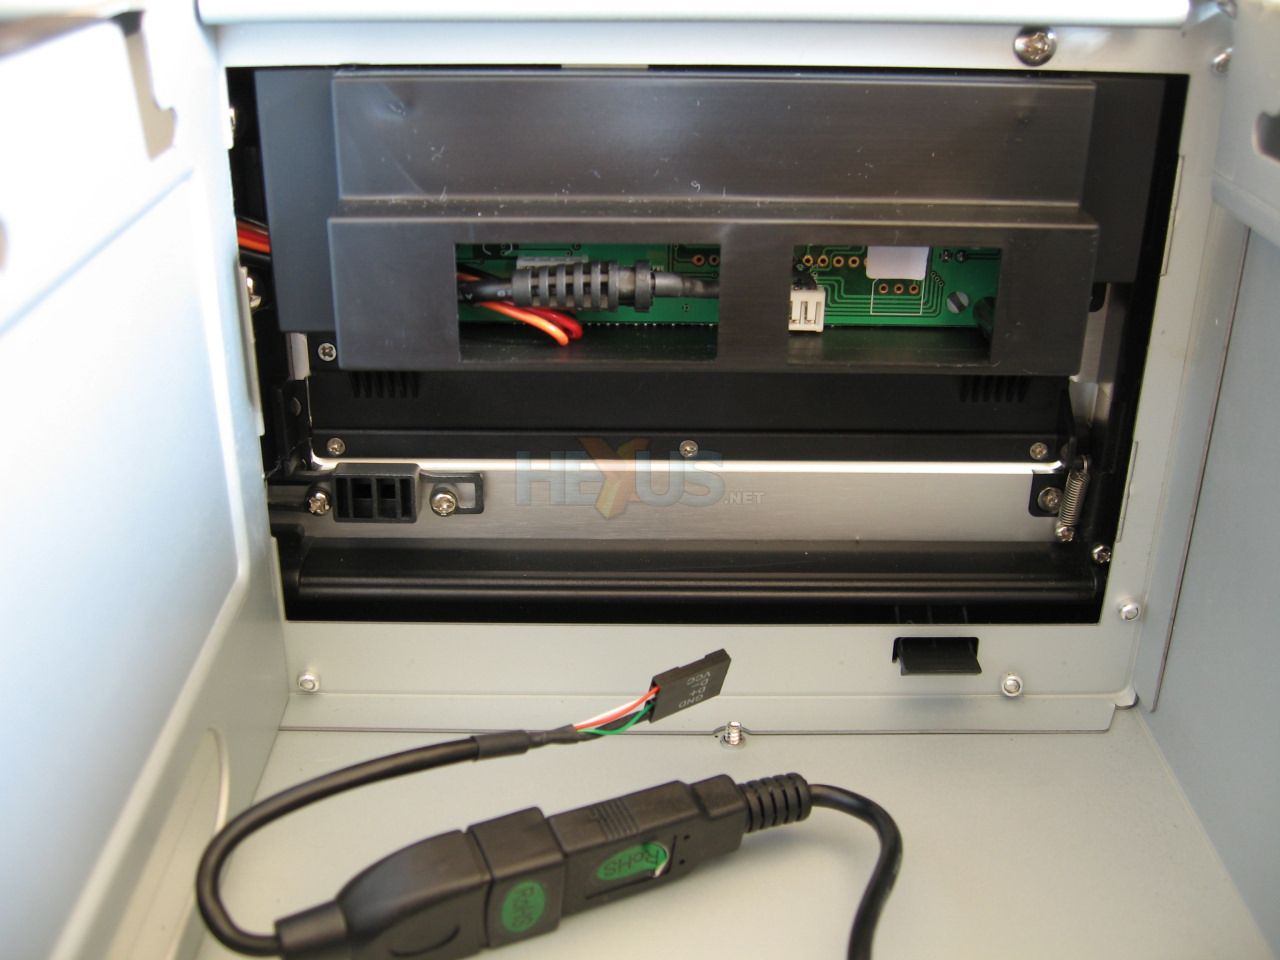
Once the rack has been removed it reveals the 5.25” bay area, featuring the drive cover in the lower bay and the VFD, protected by a simple black plastic housing.
The VFD itself is powered through a floppy drive connector but the data feed can be connected via a USB header on the motherboard or removing the adapter and feeding the cable through the back of the chassis and into one of the on-board motherboard USB ports.


